
Connector Keying Differences Across Top Tool Brands
Mechanical connector keying and pin-sequencing strategies vary significantly across major power-tool brands, and these differences dictate orientation safety, signal-before-power behavior, insertion durability, and whether aftermarket packs or chargers operate reliably. This expanded guide details keying families, brand tendencies, structural tolerances, measurable QA methods, field inspection checklists, reproducible bench/lab tests, numeric acceptance gates, procurement wording, and CSV/report formats required for safe cross-brand compatibility validation.
1. Safety first
Never evaluate swollen, cracked, smoking, sparking or >50 °C packs—move them outdoors onto a fire-resistant surface and tag QUARANTINE. Do not force insertion; mechanical fit does not guarantee safe electrical alignment. Reverse-polarity, high-current let-through and arc-flash testing must only occur in certified environments with current-limited supplies, blast shields, thermal cameras, and PPE. Field technicians should limit checks to visual inspection, slow insertion, basic continuity, LED behavior, and swap tests. High-risk sequencing tests are lab-only.
2. Why keying & pin sequencing matter
Keying is a functional safety mechanism, not cosmetic shaping. Proper key geometries prevent reversed orientation, enforce correct insertion depth, stabilize terminals during vibration, and guarantee that thermistor/ID pins engage before power pins. A pack may “slide in” but still fail due to incompatible pin lengths, reversed sequencing, charger/tool logic conflicts, or hidden proprietary cams. Incorrect sequencing can trigger arc wear, derating, early cutout, thermal accumulation, and in extreme cases cell-level stress that accelerates degradation.
3. Common keying families you’ll encounter
1. Asymmetric rail + latch systems
Used for strong retention and reversal prevention. Rail depth, taper and pitch vary by brand, affecting cross-compatibility.
2. Indexing ribs/tabs
Fine alignment features ensuring precise lateral and vertical orientation. A slight mismatch often leads to partial engagement that may appear correct but fails electrically.
3. Staggered pin lengths
ID/thermistor pins intentionally lead power pins by several milliseconds to ensure the tool/charger validates pack identity before applying current.
4. Proprietary cams/cavities
Used by premium brands to block unauthorized housings. Even visually compatible packs may fail due to hidden internal stops.
5. Recessed terminals and deep wells
Increase durability under vibration, reduce accidental shorts, and improve terminal stability.
Each family balances molding complexity, contact reliability, safety, and long-term retention under mechanical stress.
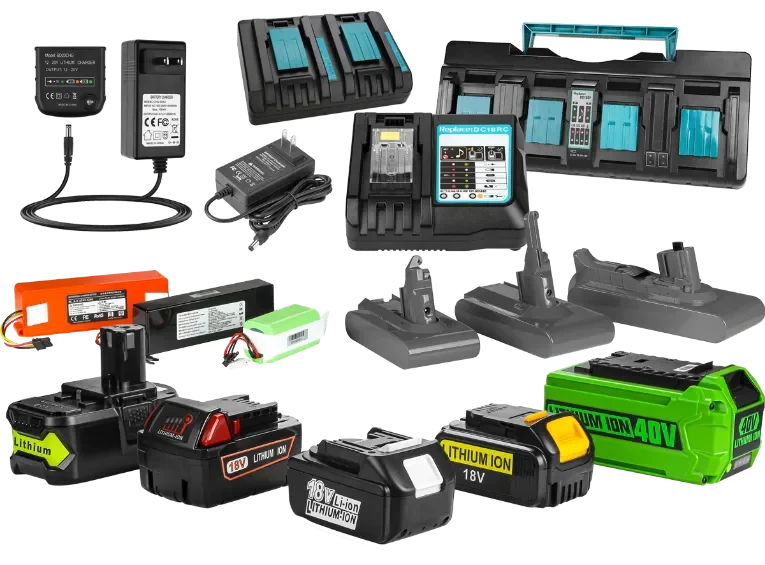
1. Brand snapshot (note: individual series vary)
DeWalt — Large T-rails, strong latching, predictable terminal geometry. Thermistor/ID access differs by line; CAD review per model is required.
Milwaukee — Deep wells, wide rails, metal guides for heavy-duty stability. Sequencing tends to be consistent but must be validated for each M12/M18 generation.
Makita — Asymmetric keyed rails, sealed terminal blocks, increasingly debris-resistant connectors on recent BL-series packs.
Bosch — Compact, tight tolerances, very strict staggered pin lengths; sequencing is sensitive to aftermarket mismatch.
Ryobi / consumer brands — Wider tolerance bands, simpler rails. Mechanical fit may hide poor high-current or sequencing behavior—bench validation required.
Dyson — Fully proprietary housings and unique pinouts. Cross-model assumptions are unsafe; must test per model.
Guideline: brand tendencies help triage, but model-specific CAD and pinout tables are mandatory.
5. Reproducible inspection & test protocol
Field inspection (60–90 seconds)
-
Check rails, latch integrity, terminal debris, cracked plastics, and alignment wear.
-
Insert slowly—confirm clean latch engagement without resistance or side-loading.
-
Observe LED/tool behavior for at least 60 s to detect intermittent sequencing or contact issues.
-
Swap with a known-good pack/tool to isolate mechanical vs electrical faults.
Bench tests (routine, non-destructive)
-
Contact resistance measurement:
Measure in milliohms under defined clamp force, compare with golden-unit baseline. -
Slow-make sequencing capture:
Use an oscilloscope to record the order and timing of ID/thermistor vs power pin engagement. -
Reverse-insert simulation:
Extremely low-current, current-limited polarity test to confirm whether protection exists and measure let-through energy. -
Insertion endurance cycling (≈1,000 cycles):
Record latch wear, rail deformation, ΔR, and dimensional drift.
Lab tests (destructive or specialized)
-
High-current fault let-through characterization (I²t measurement).
-
Combined vibration + thermal cycling for accelerated connector wear.
-
Terminal teardown inspections: plating thickness, weld quality, guide geometry, deformation after endurance cycles.
6. Acceptance gates & numeric thresholds (example)
-
Contact resistance (new): ≤ 5–10 mΩ at contract-specified clamp force.
-
Endurance: ≥1,000 insertion cycles with ≤20% ΔR, no latch fractures, no rail deformation >0.2 mm.
-
Pin sequencing: ID/thermistor pins must lead power by ≥10–15 ms under slow-make test.
-
Dimensional tolerance: Rail/latch critical features within ±0.2 mm of STEP reference.
-
Reverse-insert energy: Must remain below contract-specified Joule or A²·s thresholds.
These values should be contractually binding, supported by raw CSV logs.
7. Troubleshooting & field triage flow
-
If heat, smell, swelling → quarantine immediately.
-
Clean terminals and inspect rails for wear or misalignment.
-
Reseat; confirm latch click; monitor LED behavior.
-
Swap with golden tool/pack.
-
Measure basic continuity/contact resistance.
-
If intermittent contact, arcing marks, or unexplained cutouts persist → run slow-make and controlled reverse-insert evaluations; escalate to lab testing.
8. QA data & reporting formats
Demand raw data, not only summaries.
Minimum CSV schema
SampleID,LotID,Brand_Model,TestDate,TestType,ClampForce_N,
ContactResistance_mOhm,PinSequence_ms,MaxTemp_C,
InsertionCycles,DeltaR_percent,VisualNotes,Operator
Additional required files
-
Thermal/IR images (lossless).
-
Oscilloscope CSV logs for slow-make sequencing.
-
STEP CAD with datum callouts for rails, latches, and terminal blocks.
-
Short PDF report referencing all raw data and acceptance gates.
9. Procurement & contract wording (copy-ready)
“Supplier must provide: (1) STEP CAD with latch/rail datums; (2) complete pinout and staggered pin-length table; (3) contact-resistance CSVs from ≥5 units per lot; (4) ≥1,000-cycle insertion endurance with ΔR data; (5) oscilloscope slow-make sequencing logs; (6) reverse-polarity protection description and maximum I²t let-through. Final acceptance requires passing all golden-matrix thresholds and reviewing all raw test logs.”
10. Recommended visuals
-
Annotated photos highlighting asymmetric rails, indexing ribs, staggered pins and recessed terminals.
-
Slow-make sequencing diagrams illustrating pin engagement order.
-
Comparison table: keying family vs typical failure symptom.
-
Field triage flowchart.
-
Downloadable CSV template and sample STEP geometry snippet.
11. FAQ
Does a correct mechanical fit guarantee compatibility?
No. Incorrect sequencing or thermistor/ID mismatch can still cause refusal or damage.
How many insertions should a pro-grade pack survive?
Around 1,000 verified cycles with acceptable ΔR drift and no latch deformation.
Why does the tool click but fail to power on?
Most common cause: ID/thermistor pin engages late or fails to engage before power pins.
12. Conclusion
Connector keying defines orientation safety, signal-before-power behavior, and long-term durability, but true compatibility depends on validated pin sequencing, stable contact resistance, controlled mechanical tolerances, and transparent supplier data. Always require complete raw logs, CAD, sequencing captures, and dimensional verification before approving aftermarket replacements for fleet deployment.