
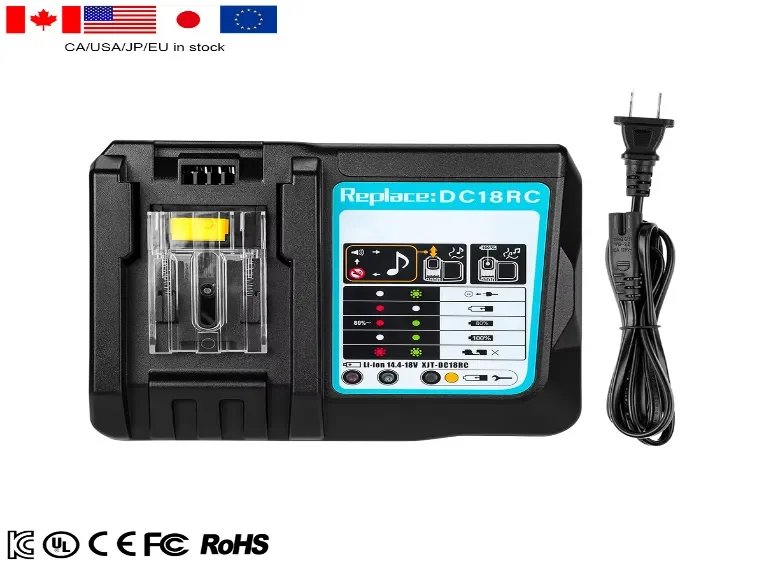
How Should You Maintain Your Makita 18V Charger for Peak Performance?
18 V LXT Charger Care:
• Monthly: Unplug, clear vents, wipe with 99% IPA.
• Quarterly: Swab terminals with alcohol, remove corrosion.
• 6‑Month: Verify no‑load voltage \~21.6 V; under load ≥ 18 V.
• Cord: Inspect for damage, coil loosely, hang to prevent kinks.
• Storage: Store upright in cool, dry, covered area; power on quarterly.
• Troubleshoot: Check power/LEDs, reseat battery, clear vents, service fan or caps.
• Safety: Always unplug, wear eye protection and gloves, apply solvents via cloth.
A well maintained charger is essential for safety, reliability, and durability. Follow these steps to keep your Makita 18 V LXT charger running at its best:
Tools & Supplies Needed
Maintaining and troubleshooting your Makita 18 V LXT charger and batteries requires only a few readily available tools and supplies. You’ll need a soft‑bristle nylon brush (3H hardness or softer) to loosen dust and debris from vents and contacts without scratching the plastic housing, plus a can of compressed air (0.2–0.4 MPa) for blasting away grit in hard‑to‑reach areas. Keep on hand 99 percent isopropyl alcohol with lint‑free cotton swabs or microfiber cloths to dissolve grease, oil, and oxidation without leaving residues, and a clean, dry lint‑free cloth for final polishing of terminals. A reliable digital multimeter capable of reading up to 30 V DC lets you verify charger output and battery resting voltage, ensuring each cell charges correctly. Disposable nitrile gloves protect your hands from solvents and grime, while silica‑gel packets help maintain a low‑humidity storage environment. For long‑term safety or reconditioning cycles, a fire‑resistant container provides extra peace of mind. With these simple supplies at your disposal, you can clean, inspect, and test your Makita charger and battery packs quickly, accurately, and safely.
- Soft-bristle nylon brush (hardness ≤ 3H)
- Compressed air (0.2–0.4 MPa)
- 99 % isopropyl alcohol
- Lint-free cloths or cotton swabs

for Makita LXT 14V4-18V Charger
1. Clean External Surfaces Monthly
Once a month, disconnect your Makita 18 V LXT charger from the mains and let it cool completely. Use a soft‑bristle nylon brush to gently sweep away dust and debris from vents, housing seams, and around any LED status indicators—avoid pressing too hard to prevent scratching the plastic. Follow up with short bursts of compressed air (0.2–0.4 MPa) to expel particles lodged deep in the fan intake or between the battery rails. Lightly moisten a lint‑free cloth or cotton swab with 99 percent isopropyl alcohol (don’t soak it) and wipe all external surfaces, especially the contact plates, to dissolve grease or oxidation. Allow the charger to stand for five minutes so any residual alcohol evaporates fully before plugging it back in.
- Unplug the charger before cleaning.
- Blow out vents and crevices with short bursts of compressed air.
- Wipe housing with a cloth dampened (not soaked) in isopropyl alcohol.
Maintaining clear vents preserves airflow and prevents overheating.
2. Deoxidize Contact Terminals Quarterly
Every three months, power down and unplug your Makita 18 V LXT charger before deoxidizing its contact terminals to restore optimal conductivity and prevent charging faults. Begin by brushing the terminals gently with a soft‑bristle nylon brush to dislodge loose oxidation or debris. Next, apply a small amount of electronics‑grade contact cleaner or 99 percent isopropyl alcohol to a lint‑free swab—never spray directly onto the contacts—and wipe each plate and rail until the metal regains its natural shine. For stubborn corrosion, lightly work a pencil‑eraser or dedicated contact‑cleaning stick across the terminals, then follow with another alcohol swab to remove residue. Allow the contacts to air‑dry for at least five minutes, then visually inspect under good light: the surfaces should look uniformly bright without pitting or dark spots. When fully dry, reconnect power and test a battery to confirm a solid, noise‑free charge. Regular deoxidization ensures low resistance, prevents heat buildup, and keeps your charger performing safely and efficiently over years of use.
- Dip a lint-free swab in isopropyl alcohol.
- Gently rub both charger and battery contacts to remove oxidation.
- For stubborn corrosion, lightly abrade with a fine, non‑metallic pad.
Clean terminals ensure reliable power transfer and prevent intermittent faults.
3. Inspect & Care for Power Cord
Each time you service your Makita 18 V LXT charger, take a moment to inspect the entire length of its power cord before plugging it in. With the charger unplugged, flex the cable gently from end to end—paying special attention to the plug head and the point where the cord enters the charger housing—to reveal any hidden nicks, cuts, or stiffness that might indicate internal wire fatigue. Look for exposed conductors, frayed insulation, or areas where the jacket feels thin or brittle. If you spot any damage, retire the cord immediately and replace it with a genuine Makita replacement; do not attempt temporary repairs with tape or splice kits, as these can compromise grounding and raise fire risk. When storing, avoid tight coils or sharp bends—instead, loosely loop the cord in large, relaxed circles and secure it with a soft Velcro strap. Keep it off concrete floors, away from heat sources and chemical spills, and never stretch the cable taut during use. By routinely examining, flex‑testing, and properly stowing your charger’s power cord, you’ll maintain a safe, reliable connection and prolong the life of both cord and charger.
- Monthly: Check for cuts, frays, or kinks.
- Storage: Loosely coil; avoid tight bends or tension.
- Mounting: Hang or shelf at elbow height to prevent pinch points.
Proper cord care reduces risk of electrical shorts and extends charger lifespan.
4. Verify Charger Performance Every 6 Months
Every six months, you should bench‑test your Makita 18 V LXT charger to confirm it still delivers safe, accurate charging. Begin by plugging it into a dedicated outlet and letting it idle for five minutes so its thermal sensors stabilize. With no battery inserted, use a digital multimeter set to DC volts and touch the positive and negative output terminals— you should see roughly 21 V under no‑load conditions. Next, attach a fully charged, known‑good LXT pack and time a standard 30‑minute charge cycle, noting the increase in battery voltage (expect a 2–3 V rise) and ensuring the charger’s LEDs behave normally. While it runs, lightly feel the housing: it should be warm, not hot. Finally, test with a second pack to rule out battery variation, then record all readings—voltage, temperature, charge time, and any unusual LED patterns—in a simple log. By comparing these numbers over time, you’ll spot gradual performance declines early and know exactly when to service or replace your charger.
- Open-Circuit Voltage: Measure output with no battery attached—should read 21.6 V ± 0.2 V.
- Load Test: Attach a resistor or dummy load at rated current; voltage under load should remain ≥ 18 V.
Out-of-spec readings indicate worn components (capacitors or transformer) and the need for service.

for Makita 18V LXT Charger
5. Storage Best Practices
When you’re not using your Makita 18 V LXT charger or battery packs, treat them as precision tools that need a stable, protective home. First, remove batteries from both tools and charger, wipe their contacts clean and dry, and bring each pack’s state of charge to around forty to sixty percent—this mid‑range voltage minimizes chemical stress and self‑discharge. Store everything in a climate‑controlled area between 5 °C and 40 °C with relative humidity below fifty percent, away from direct sunlight, heaters, air‑conditioning vents, and uninsulated exterior walls. Lay the charger flat or hang it by its strain relief, loosely coil its cord in large loops, and keep it off concrete or metal surfaces that can wick away heat or draw moisture. Place batteries upright in individual compartments or a sturdy plastic bin lined with silica‑gel packs to prevent accidental contact and guard against moisture. Finally, every three months revisit your storage—check voltages, inspect for swelling or damage, and rotate packs so none remain idle for more than six months. This routine keeps your Makita system ready, reliable, and safe for every job.
- Environment: Store in a cool (5 °C–40 °C), dry area with < 50 % humidity.
- Position: Keep upright, away from direct sunlight and corrosive fumes.
- Cover: Use a dust cloth during long idle periods and perform a power-on test every 3 months.
Proper storage prevents moisture ingress and component drift.
6. Troubleshoot Common Charger Issues
When your Makita 18 V LXT charger fails to initiate or completes charge cycles abnormally, start by verifying the outlet and cord: plug the charger into a known‑good, dedicated receptacle and inspect the entire cable for cuts, kinks or exposed conductors. Next, remove any battery and watch the LED indicators—if they blink or stay off, the charger’s internal diagnostics may have detected a fault; power‑cycle it by unplugging for two minutes, then retry. If an inserted pack refuses to charge or the LED flashes erratically, gently clean both the charger’s contact plates and the battery rails with a lint‑free cloth dampened in 99 percent isopropyl alcohol, then allow five minutes for full evaporation. Persistent “no‑charge” behavior often stems from worn or corroded contacts, so compressed air can help dislodge hidden debris in the rail guides. Should the charger heat excessively during a nominal cycle, ensure its vents are clear of dust by brushing and blowing them out; an obstructed fan intake can trigger thermal cutoff. If, after these steps, the charger still won’t recognize multiple known‑good batteries, its internal PCB or capacitors may have degraded—at that point, replacement with a genuine Makita unit is safer than continued use. Regularly logging outlet voltage, charge times, and LED patterns will help you spot gradual performance declines and decide when it’s time to service or swap out your charger.
- No LEDs or Power: Test outlet and fuse; inspect cord continuity.
- Error Flashes (Red/Green): Reverse-polarity or handshake error—reseat battery correctly.
- Overheating: Clear vents, ensure ambient < 40 °C, replace fan if silent.
- Slow or Incomplete Charge: Likely aging capacitors—seek professional capacitor replacement.
Following these checks quickly isolates faults and avoids unnecessary part swaps.
7. Safety Precautions
Before you ever touch your Makita 18 V LXT charger or battery packs, unplug the charger and let it cool completely; never attempt cleaning or inspection while it remains energized or hot. Work in a well‑ventilated, dry area clear of flammable vapors, dust, or moisture, and keep children or pets out of your workspace. Wear safety glasses and nitrile gloves whenever you use compressed air or isopropyl alcohol to protect your eyes and skin from debris and solvent splashes. Never spray liquids directly onto the unit—always apply cleaners to a cloth first—and avoid covering vents or placing the charger on soft surfaces that could obstruct airflow. Inspect the power cord and housing for damage before each use, and if you detect fraying, cracks, or overheating, retire the charger immediately. Do not open the charger’s housing or attempt any internal repairs; instead, replace it with a genuine Makita unit or seek service from an authorized center. Finally, follow Makita’s specified operating temperature, humidity, and outlet requirements to ensure safe, reliable performance every time.
- Always unplug before disassembly or fluid cleaning.
- Wear eye protection when using compressed air.
- Use nitrile gloves to prevent static discharge and skin contact with solvents.
- Never spray solvents directly into vents—always apply to cloth first.
Adherence to safety protocols protects both you and your equipment.
Conclusion
Regular external cleaning, contact maintenance, cord care, performance verification, and proper storage—combined with vigilant troubleshooting and safety practices—ensure your Makita 18 V charger delivers consistent, reliable performance and maximizes the life of both charger and batteries.