
Replace & Upgrade Black & Decker Replacement Battery: OEM & Repair Tip
Replacing or upgrading the battery in your Black & Decker (B&D) portable vacuum keeps it running like new—and can even boost runtime. In this guide, we’ll explain when to swap your pack, walk you through OEM and DIY repair choices, and highlight cost-effective aftermarket options from XNJTG, your factory-direct partner for professional-grade Li-ion replacements.
To replace and upgrade your Black & Decker battery pack, first confirm your tool’s model and voltage, then order matching OEM cells. Remove the pack housing, desolder the old cells, and solder in new high-capacity replacements, ensuring correct polarity. Insulate all connections with heat-shrink tubing, add a balance lead if available, and reassemble the pack. Perform a full charge/discharge cycle to calibrate and maintain peak performance. Regularly clean terminals and avoid deep discharges to maximize runtime and safety.

1. When and Why Should You Replace Your B&D Power Tool Battery?
You should replace your Black & Decker power tool battery when you notice significantly reduced runtime, slow charging, or if the pack shows swelling, overheating, or warning lights—typically after 300–500 full charge cycles. Aging cells lose capacity and can overheat, risking damage to your tool or injury. Swapping in a fresh OEM or high-quality replacement restores peak performance, ensures consistent power delivery, and maintains safe operation for precision work and extended runtimes.
Over time, Li-ion cells lose capacity and safety margins. Watch for these signs before total failure:
- Signs of Wear
- Runtime ↓ > 50%
- Charger error LEDs or beeps
- Excessive heat during charge/use
- Pack swelling or bulging - Typical Cycle Life
- 12 V packs: ~300–500 full cycles
- 20 V Max packs: ~500–800 cycles
- 40 V Max (if applicable): ~600–900 cycles
> Pro Tip: Keep a usage log. Note charge dates and run times—sharp drops indicate it’s time to replace.
2. Pre-Replacement Checklist
Before you begin replacing your Black & Decker battery pack, it’s essential to verify the exact model number and rated voltage of your tool. Consult the stamp on the battery housing or refer to the owner’s manual to record the precise specifications. Once you have this information, source genuine OEM cells or high-quality replacement batteries from a trusted supplier, ensuring that the capacity (mAh), continuous discharge rating, and physical dimensions match the original pack. Cross-check the battery chemistry—NiCd, NiMH, or Li-ion—to avoid compatibility issues that could impair performance or safety.
Next, assemble all necessary tools and safety equipment in a well-ventilated, fire-safe workspace. You will need a soldering iron with appropriate wattage, leaded or lead-free solder, heat-shrink tubing sized for each cell connection, wire cutters, and wire strippers. Wear safety glasses and heat-resistant gloves to protect against solder splatter and sharp edges. Clear the work surface of any flammable materials and have a small container or rack ready to hold cells as you remove them. Finally, review the manufacturer’s service manual for detailed disassembly instructions and cautions, and arrange for proper recycling or disposal of spent batteries at a certified hazardous-waste facility. With these preparations complete, you’ll minimize risk and streamline the replacement process.
Before you dive in, gather the right model info, tools, and safety gear:
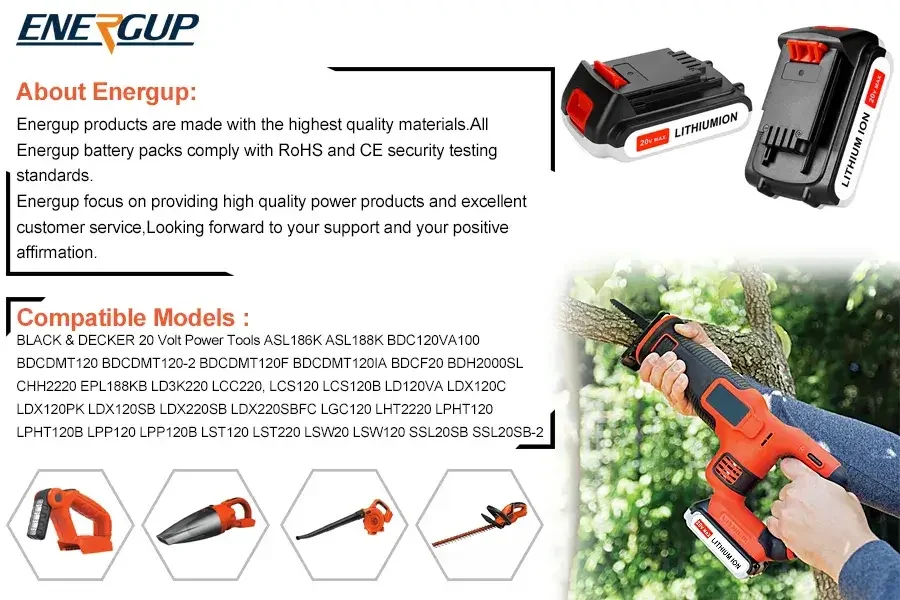
- Identify Your Model
- E.g., ASL186K, ASL188K, BDCDMT120, etc. - Tools & PPE
- T8 Torx driver
- Plastic pry-bar or spudger
- Insulated gloves
- Safety glasses - Select Your Replacement
- OEM: B&D part number LBXR20 (20 V Max)
- Aftermarket: XNJT-BLA-20V-LI packs at www.xnjtg.com
3. OEM Replacement & Repair Options
When seeking an exact fit and guaranteed performance, OEM (Original Equipment Manufacturer) replacement batteries are the safest choice. Black & Decker supplies direct-replacement packs that meet the factory’s voltage, capacity, and safety specifications. These genuine packs often include integrated battery-management circuitry and temperature sensors calibrated for your tool. Ordering OEM cells through authorized dealers or the manufacturer’s website ensures full compatibility, preserves any remaining warranty, and reduces the risk of thermal runaway or premature failure.
For cost-sensitive repairs, reputable third-party vendors offer high-quality aftermarket cells, often at lower prices. Look for brands that provide UL or CE certification, clear specifications on capacity (mAh), continuous discharge rating (A), and matching dimensions. Many also supply pre-balanced Li-ion modules with built-in protection circuits, simplifying installation and improving safety.
If you lack soldering experience or prefer professional service, local tool-repair shops can swap cells on your behalf. They typically test each cell’s internal resistance, balance the pack, and perform charge/discharge cycles to verify performance. While this service adds labor costs, it delivers a turnkey solution with minimal risk and often includes a short-term service warranty.
Official B&D Service
- Warranty Exchange: 2-year limited warranty covers defects
- Refurbished Packs: Often available at a discount via service centers
DIY Repair (Caution Advised)
- Terminal Cleaning: Remove oxidation with isopropyl alcohol.
- BMS Reset: Full discharge + recharge can revive stuck BMS.
- Cell Swap: Replacing internal 18650 cells requires spot-welding tools and voids the warranty.
> Safety Note: DIY cell swaps carry fire risk and will void any remaining warranty. For safe, warranty-backed repair, consider XNJTG’s Black & Decker replacement batteries

4. Step-by-Step Battery Swap (Dustbuster Example)
- Disassemble
- Remove the 2× T8 Torx screws on the bottom.
- Gently pry open the rear battery compartment. - Disconnect Old Pack
- Depress the plastic latch.
- Pull the connector straight out. - Install New Pack
- Align pack arrows with housing markers.
- Push the connector until it clicks. - Reassemble & Test
- Replace screws snugly (do not overtighten).
- Charge fully, then run the power tool to verify restored performance.
5. Top Aftermarket Battery Picks
Compare capacity, cost savings, and warranty to choose the best third-party option:
| Option | Capacity | Cost vs. OEM | Warranty | Notes |
| XNJT-BLA-20V-LI | 1.5-6.0 Ah | – 56% | 12 months | Smart BMS, thermal protection |
| B&D Refurbished LBXR20 | 2.0 Ah | – 30% | 12 months | OEM cells, limited factory warranty |
> XNJTG Advantage: All XNJTG packs are ISO-manufactured, pass 500+ cycle tests.
6. Post-Installation Tips & Troubleshooting
- No power?
- Clean battery contacts with alcohol.
- Ensure the pack is fully seated. - Short Run Time?
- Cycle the pack (full discharge/charge) 2–3 times. - Maintenance
- Avoid deep 0% discharges.
- Store at 20–25 °C when idle.
- Remove the pack between uses to prevent parasitic drain.
7. Eco-Friendly Disposal & Recycling
Help the planet—and comply with regulations—by recycling your old pack:
- Free Mail-In: Through Home Depot or Homebase recycling programs
- Local Drop-Off: Most e-waste centers accept Li-ion batteries.
> Green Tip: Always tape terminals and place each pack in a protective bag before shipping or drop-off.

8. Frequently Asked Questions
Can I use a DeWalt 20 V pack in my B&D power tool?
No—B&D’s connector and BMS protocols differ. Use a matched voltage pack or XNJTG’s custom BLA-20V-LI adapter.
Why does my new pack drain faster initially?
BMS recalibration can take 1–3 full cycles; runtime stabilizes afterward.
Enjoy longer runtimes, lower costs, and eco-friendly recycling with XNJTG’s professional-grade power tool battery solutions!