
Ryobi 18V Charger Teardown — Inside the PCB Explained
Ever wondered what really goes on inside a Ryobi 18V charger? This teardown guide walks through a safe inspection process, a block-level PCB overview, key components, failure modes, diagnostic methods, and an OEM vs. clone comparison. It’s a practical resource for understanding how design choices affect safety, performance, and long-term reliability.
Safety First — High Voltage Warning
Chargers contain lethal voltages. Only trained technicians with proper PPE (insulated tools, goggles, gloves) and equipment (isolation transformer, discharge resistor) should attempt teardowns. Always discharge capacitors before handling and never bypass safety systems.
External Inspection Before Opening
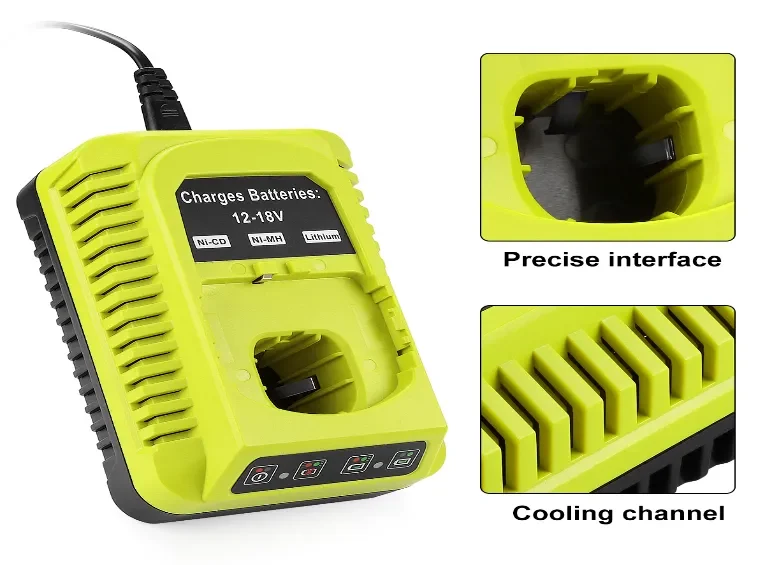
Before cracking it open, check the exterior: housing integrity, vents, cord strain relief, fuse ratings, and labels. Photos of orientation and serials make reassembly easier. Build quality at this stage often reveals whether you’re holding a rugged OEM unit or a cost-cutting clone.
Step-by-Step Teardown
Carefully remove screws and hidden clips, detach the power cord without stressing solder joints, and lift the PCB free. Note how the LED board, battery bay contacts, and transformer are positioned — the internal layout reveals the charger’s engineering priorities.
PCB Overview & Functional Blocks
Ryobi chargers follow a structured flyback SMPS design with clear PCB regions:
-
Input protection: fuse, MOV, NTC, EMI filter.
-
Rectification & bulk storage: bridge rectifier, electrolytic capacitors.
-
Switching stage: MOSFETs and PWM controller driving the transformer.
-
Secondary rectification & filters: Schottky diodes, capacitors, inductors.
-
Feedback loop: optocoupler and voltage reference for precise regulation.
-
Battery interface: sense pins, thermistor line, ID resistor handshake.
-
LED driver & logic: status indication and charge management.
Component-Level Walkthrough
-
Fuse & MOV — sacrificial protection against shorts and surges.
-
Bridge rectifier & bulk caps — AC-to-DC conversion, ripple control.
-
MOSFETs & controller IC — regulate high-frequency switching.
-
Transformer — provides galvanic isolation and voltage step-down.
-
Secondary rectifiers & filters — smooth DC delivery to the pack.
-
Feedback loop — optocoupler ensures safe, precise voltage/current.
-
Battery contacts & thermistor link — manage pack ID and safe thermal cutoffs.
-
LED indicators — communicate charging status and fault codes.
Component grade and soldering quality clearly differentiate OEM chargers from clones.
Built-In Safety & Design Quality
OEM Ryobi chargers typically feature:
-
Proper creepage/clearance distances.
-
Robust temperature sensing and thermal cutoffs.
-
MOV and NTC surge protection.
-
Safety-rated capacitors and UL-listed fuses.
Clone units often skimp on these, raising risks of overheating, fire, or premature failure.
Common Failure Modes & Symptoms
-
Bulging capacitors → slow charge, unstable voltage.
-
Blown fuse → completely dead unit.
-
Failed MOSFET/controller → burnt smell, no output.
-
Bad optocoupler → erratic voltage regulation.
-
Corroded contacts → intermittent battery recognition.
-
Thermistor issues → false “hot/cold pack” errors.
Diagnostics for Trained Technicians
-
Offline tests: continuity checks, diode mode, ESR on capacitors.
-
Live tests (with isolation): check rectified DC bus, observe switching waveforms, and measure output ripple with an oscilloscope.
-
Abnormal noise, excessive ripple, or unstable switching signals typically point to failing capacitors, MOSFETs, or feedback circuitry.
Repair or Replace?
Repairable: fuses, capacitors, corroded connectors, and basic solder cracks.
Replace recommended: burnt MOSFETs, controller ICs, damaged transformers, or charred PCB traces. Cost, safety, and reliability usually favor replacement unless the unit is part of a managed fleet with in-house electronics service.
Why Chargers Reject Some Batteries
Ryobi chargers use ID resistors and thermistor values to verify pack authenticity and condition. If signals don’t match the expected range, the charger refuses to initiate charging — protecting both the pack and the user from unsafe conditions.
Practical Advice for Fleets & Maintainers
-
Log charger serials and service history.
-
Perform routine inspections of vents, cords, and LEDs.
-
Replace capacitors proactively in high-cycle environments.
-
Retire chargers with repeated intermittent faults.
-
Standardize on OEM units for consistent safety and pack longevity.
Engineering Takeaways
Ryobi’s 18V charger is a compact, disciplined flyback SMPS design. It combines isolation, surge protection, precise regulation, and thermal safeguards in a way many clone chargers don’t. The result is better safety margins, longer service life, and more consistent charging performance.
FAQ
Q: What usually fails first in a Ryobi charger?
A: Electrolytic capacitors and fuses tend to be the first weak points.
Q: Is repair worth it?
A: Only for simple component swaps by skilled technicians. In most cases, replacement is safer and cheaper.
Q: Why does my charger reject certain packs?
A: Likely due to ID resistor or thermistor mismatches — the safety logic is designed to block unsafe charging.
Conclusion
A teardown of the Ryobi 18V charger reveals careful PCB design, quality components, and layered protections that set OEM products apart from clones. While minor repairs may be possible, replacement is the safer path for most users. For fleet managers, regular inspection and proactive replacement keep downtime and risks to a minimum.