
Troubleshooting Common Dyson V8 Battery Replacement Issues
A properly functioning battery pack is essential for your Dyson V8 vacuum to deliver full suction and runtime. Over time, you may notice diminished performance, failure to charge, or error LEDs after installing a replacement battery. This guide walks you through the most frequent V8 battery problems, explains why they occur, and shows you how to fix them step by step—no guesswork required.
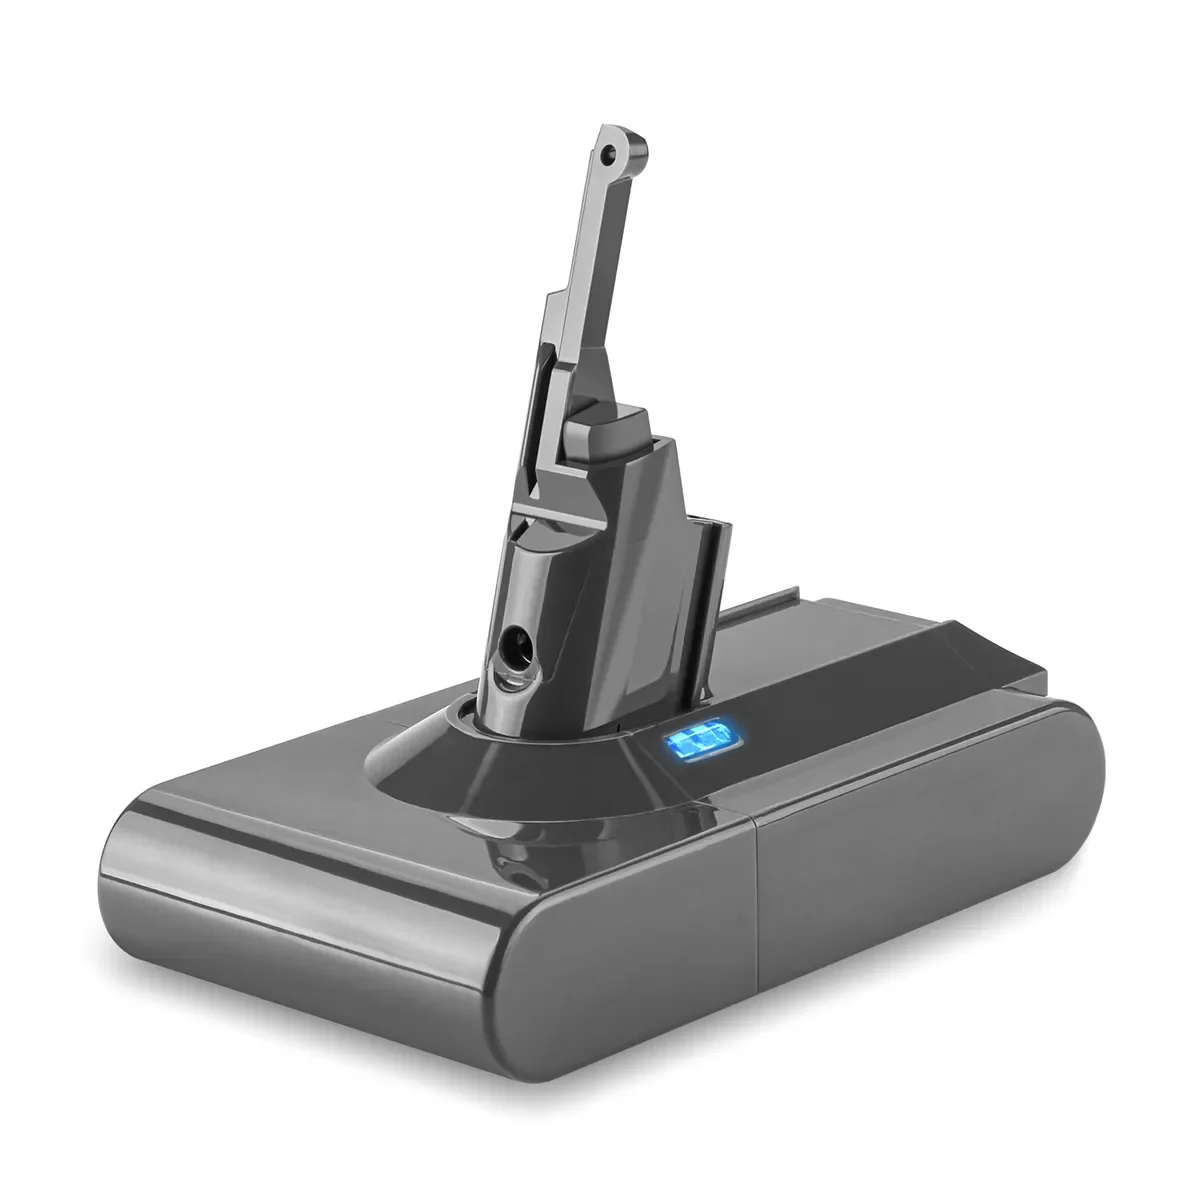
Understanding Dyson V8 Battery Basics
Dyson V8 Battery Anatomy
- Cell Configuration
The V8 pack is built from six 18650 lithium-ion cells arranged as two parallel strings of three cells in series (3 S 2 P). Nominally, each cell is 3.6 V (charged to 4.2 V), yielding a 21.6 V pack (3 × 4.2 V ≈ 12.6 V under load, but marketed as 21.6 V).
- Capacity Variations
OEM packs typically range from 2,100 mAh to 2,900 mAh. High-capacity aftermarket options may push 3,400 mAh–4,000 mAh—trading a bit more weight for up to 20 % extra run time.
- Battery Management System (BMS)
The small PCB inside the pack handles:
1. Over-charge protection: Stops charging when any cell reaches ~4.2 V.
2. Over-discharge protection: Cuts output if any cell drops below ~2.5 V.
3. Over-current protection: Detects sudden high currents (e.g., motor stall) and shuts off.
4. Thermal monitoring: Locks out charging or discharging if temperature goes below ~5 °C or above ~45 °C.
How Charging Works on the V8 Platform
1. Docking and Pin Alignment
- The V8’s removable battery slides into the vacuum handle or docking station. Two metal pins on the pack connect with matching pins in the charger, while a plastic guide prevents misalignment.
2. LED Indicator Behavior
- Solid Red: Charging
- Solid Green: Fully charged
- Flashing Red: Fault (temperature outside safe range, internal short, or BMS lockout)
- Flashing Green (Aftermarket): Maintenance/top-off mode—rare on OEM chargers.
3. Charge Curve & Timing
- 0 → 80 %: Approximately 3 hours on the official Dyson charger.
- 80 → 100 %: Tapers off slowly over the next 30–60 minutes to balance cells. You may see the LED remain red even when near full capacity.
Safety Precautions Before Working on the Pack
1. Unplug and Cool Down
Always disconnect the charger and let the pack sit for at least 30 minutes at room temperature (20 °C–25 °C). Hot cells can spark if shorted.
2. Wear Protective Gear
If you suspect internal damage (swelling, dented casing), don safety glasses and nitrile gloves—especially when opening the pack.
3. Work on an Insulated Surface
Place the battery on a non-conductive mat or wooden bench. Keep metal tools off the work surface to avoid accidental shorts.
Common Replacement Issues and Their Root Causes
Even brand-new replacement batteries can exhibit problems if installation, compatibility, or quality aren’t spot on. Below are the most frequent symptoms with their likely causes and quick detection tips.
Vacuum Won’t Turn On After Swapping Batteries
- Poor Contact Between Pack and Housing
Aftermarket packs occasionally have slight dimensional variances. If the terminals don’t fully mate, the BMS won’t let the motor draw current.
- Latch Misalignment or Warped Casing
Crooked plastic housing or a bent latch can prevent a solid “lock-in.” The BMS sees a missing pack and won’t power up.
Battery Doesn’t Charge or Charges Very Slowly
- Dirty or Corroded Terminals
Even a thin layer of dust, hair, or skin oil creates resistance. The charger either refuses to detect the pack or dribbles current in trickle mode.
- Broken PCB/Wiring Inside Pack
A drop or manufacturing defect can fracture a trace on the BMS board, interrupting the charge path.
- Charger vs. Pack Fault
- Swap Charger: If another known-good pack charges normally on your charger, the issue is in the replacement.
- Swap Pack: If your new pack never charges on multiple chargers, it’s almost certainly a pack defect.
LED Stays Flashing Red or Stuck on Red
- BMS Lockout from Deep Discharge
Draining cells below ~2.5 V triggers protective shutdown. The pack must be “awakened” by a controlled recharge.
- Thermal Protection Engaged
Charging in a cold (< 5 °C) or hot (> 45 °C) environment locks the BMS. Wait until the pack is at a normal room temperature.
Rapid Drain or Short Runtime
- Cell Imbalance or Low-Grade Cells
Mismatched cells or low-capacity clones show high internal resistance. Under load, voltage sags quickly, giving only a few minutes of runtime.
- Parasitic Draw by Vacuum Electronics
Some knock-off packs lack precise BMS calibration. The V8’s electronics may draw idle current even at rest, draining cells faster than intended.
Intermittent Power Loss or Motor Stuttering
- Voltage Sag Under Load
Faulty or cheap cells can’t sustain high current peaks (brushless motor can spike > 30 A). The voltage collapse triggers a BMS shutdown.
- Incomplete Seating
A pack that “clicks” but still wobbles will lose contact when the vacuum vibrates, causing momentary power dropout.
Step-By-Step Troubleshooting Guide
Follow these steps in order. Each step eliminates a common failure point.
Step 1 – Inspect and Clean Contacts
1. Remove the Battery and Wand
Detach the pack from both the vacuum handle and the charger.
2. Clean Charger Pins & Battery Terminals
- Dip a lint-free cloth or cotton swab in 90 %+ isopropyl alcohol.
- Gently rub each metal pin on the charger and each terminal on the battery.
3. Check Inside the Battery Slot
- Shine a flashlight into the vacuum’s battery well.
- Remove any hair, lint, or debris with a plastic pick or canned air.
Step 2 – Verify Proper Seating and Latch Function
1. Reinsert the Battery Firmly
Push in until you feel a definitive “click.”
2. Inspect the Latch Mechanism
- Press the latch repeatedly to ensure it isn’t bent or caught on plastic.
- Look for any housing deformities around the latch area.
3. Perform a Wiggle Test
Lightly wiggle the pack up and down—no movement should be felt. If it shifts, remove and try again.
Step 3 – Test with a Known-Good Charger
1. Find an Alternate OEM Charger
Borrow or use another genuine Dyson V8 charger if available.
2. Observe LED Behavior
- Solid Red: Pack is charging normally
- Solid Green: Pack is fully charged
- Flashing Red: BMS fault or unsafe temperature
3. Swap Charger/Packs
- If the replacement pack behaves differently on the second charger, the original charger is suspect.
- If it refuses to charge on both chargers, the pack is at fault.
Step 4 – Perform a BMS “Hard Reset”
1. Fully Discharge in the Vacuum
- Reattach the pack and run the vacuum on low until it shuts off.
- This forces cells beneath the BMS cut-off threshold.
2. Rest at Room Temperature
- Allow the pack to sit at ~20 °C–25 °C for 30 minutes. Cells naturally rebalance at idle.
3. Recharge and Observe
- Dock the pack on the OEM charger. Watch for solid red → solid green.
- If LED stays flashing red, repeat discharge → rest → recharge one more time.
Step 5 – Measure Voltage and Internal Resistance
1. Check Open-Circuit Voltage
- Set a DMM to DC volts.
- Touch black probe to negative terminal, red probe to positive terminal.
- A healthy, fully charged pack reads ~25.2 V (6 × 4.2 V). Anything under ~18 V indicates deep discharge or cell failure.
2. Perform a Simple Load Test
- Connect a 12 Ω, 10 W resistor (or an automotive tail-light bulb) across the terminals.
- Measure voltage under load. A drop greater than 2 V suggests high internal resistance—time to replace cells or the pack.
Advanced Diagnostics and Repair Options
If basic steps don’t resolve the issue, proceed only if you’re comfortable working with Li-ion packs.
Opening the Battery Pack Safely
1. Required Tools
- Torx T6 & T8 screwdrivers
- Plastic pry tools
- ESD mat and grounding strap (recommended)
2. Disassembly Steps
1. Remove six Torx screws from the pack’s bottom.
2. Carefully pry apart the two plastic halves—note the BMS PCB and wiring orientation before disconnecting.
Cell-Level Testing and Replacement
1. Measure Each 18650 Cell Voltage
- Cells should be within ± 0.05 V of each other.
- Cells under ~3.6 V (no load) are failing or deeply discharged.
2. Check Internal Resistance (Optional)
- Use an ESR meter or measure voltage drop under a small known load.
- Replace cells with > 150 mΩ ESR or significantly lower capacity.
3. Install New Cells
- Source Grade-A 18650 cells with ≥ 15 A continuous discharge rating, matching OEM mAh.
- Solder carefully: maintain correct polarity and use proper heat to avoid damaging cell wraps.
BMS PCB Inspection and Repair
1. Visual Component Check
- Inspect MOSFETs for burn marks or cracks, and look for bulged resettable fuses (polyfuses).
- Examine solder joints for cracks, dull sheen or separation.
2. Reflow Solder Joints
- Apply flux and reflow any suspect joints with a soldering iron.
3. Replace Damaged Components
- Swap out any shorted MOSFETs, damaged resistors, or blown fuses with exact replacements.
4. Reassemble and Re-test
- After closing the shell, repeat Steps 1–5 in the basic troubleshooting to ensure everything works.
When to Seek Professional Rebuild or Replacement
- Severe Swelling or Leakage
Any sign of bulging cells or fluid is a red flag—stop DIY and consult a certified service center.
- Multiple Failed Cells
If two or more cells test bad, you’ll need a matched-cell rebuild or a new pack outright.
- Water or Chemical Damage
Corrosion can spread, making a rebuild by experts safer than a spot-repair.
Preventative Maintenance for Long-Lasting Performance
Adopt these habits to minimize future battery problems.
Proper Charging Habits
- Avoid Overnight Charging
Once the LED turns solid green, remove the pack within 30 minutes to avoid heat buildup.
- Charge in Temperature Range
Only charge when pack temperature is between 5 °C and 40 °C. Outside that range, the BMS will lock out charging as a safety precaution.
- Use OEM Chargers or Certified Equivalents
Generic Li-ion chargers may not follow Dyson’s precise charge curve or handshake protocol, risking under/over-charging.
Regular Cleaning & Inspection Routine
- Monthly Contact Maintenance
Remove the pack and wipe every metal tab on both pack and vacuum housing with isopropyl alcohol. This prevents oxidation that increases contact resistance.
- Check for Debris
Use compressed air or a small brush to clear dust, lint, pet hair, or other grime from the battery slot and contacts.
- Inspect Housing for Physical Damage
Look for cracks, dents, or unusual flex—any sign of structural weakness can cause misalignment and BMS faults.
Optimal Storage Recommendations
- Store at ~50 % State of Charge
If you won’t use the pack for over 30 days, discharge it to around half charge.
- Keep in a Cool, Dry Place
Ideal storage is 10 °C–25 °C with humidity under 50 %.
- Avoid Direct Sunlight or Freezing Conditions
UV exposure and sub-freezing temps both degrade Li-ion chemistry over time.
FAQ
How do I ensure compatibility when buying a replacement V8 pack?
- Verify the pack is rated 21.6 V and designed specifically for the Dyson V8. Look for the exact dimensions and terminal alignment. Only “Dyson V8 compatible” labels guarantee correct fit and communication with the vacuum’s BMS.
Can I use a non-Dyson charger with my V8 battery?
- No. Only Dyson’s official 21.6 V charger (or a certified equivalent) matches the V8’s BMS handshake and charge curve. Third-party or universal Li-ion chargers risk under/over-charging, which shortens pack life or causes safety issues.
What does a flashing red LED on the V8 battery always indicate?
- A flashing red LED usually means the pack’s BMS has locked due to temperature (below 5 °C or above 45 °C), deep discharge, or an internal short. Let the pack rest to room temperature and perform a BMS reset. If flashing persists, further diagnostics or cell-level repairs are needed.
Is it safe to replace individual 18650 cells in my V8 pack?
- Yes—if you match capacity (mAh), discharge rating (≥ 10 A), and chemistry (NiCoMn). Improper soldering or mismatched cells can cause imbalance or thermal runaway. Only attempt cell swaps if you have experience with Li-ion repair and the right equipment.
What runtime should I expect from a healthy Dyson V8 battery?
- On standard (non-MAX) mode, about 40–50 minutes. On MAX mode, around 7–10 minutes. If a new or replacement pack can’t achieve those figures, suspect cell quality issues or BMS calibration problems.
Conclusion
Most Dyson V8 battery replacement hiccups come down to:
1. Dirty Contacts (clean terminals & slot)
2. Improper Seating (verify latch & alignment)
3. BMS Lockouts (perform hard reset)
If deeper faults emerge—damaged cells or a faulty BMS PCB—consider a professional rebuild or buy a reputable aftermarket pack (e.g., XNJTG) that uses genuine-grade 18650 cells and a robust BMS. With good charging habits, regular contact maintenance, and proper storage, you’ll keep your V8 running at full power for years to come.