
When to Replace Ryobi Battery Cells or the Entire Pack?
This safety-first playbook helps fleet managers, technicians, and informed DIYers decide whether to replace failed cells or retire an entire Ryobi ONE+ 18 V battery pack. It delivers reproducible diagnostics, clear pass/fail rules, a certified repair workflow, and an ROI formula so you can act with evidence, not guesswork. Rule to apply now: repair only if (Repair Cost × Safety Factor) < 0.5 × New Pack Cost and only 1–3 cells are bad.
Why does this decision matter — who should read this and what will they get?
Who should read this: fleet managers, rental operators, procurement leads, maintenance supervisors, certified battery technicians, and serious DIYers who manage tool fleets. What you’ll get: a defensible, auditable decision workflow (so your insurance/procurement folks can accept it), a compact diagnostic kit list, technician-level test procedures, clear pass/fail thresholds to minimize safety risk, a technician-only rebuild SOP (for certified repair shops), a cost/ROI rule to decide economically, and procurement language to reduce liability (pilot acceptance, traceability, RMA). Applying this will reduce unsafe repairs, limit unexpected warranty/legal exposure, and direct limited repair resources only to cases that deliver measurable value.
What is the mandatory safety guidance — what must you never ignore?
Safety first — non-negotiable: If a pack is swollen, smoking, leaking, smelling of chemicals, or >50 °C, immediately isolate it on a non-combustible surface and quarantine; do not charge, do not open, and call a certified recycler or qualified service. Always work on a non-combustible bench with PPE: eye protection, insulated gloves, and face shield for technician-level work. Use a Class ABC or appropriate firefighting extinguisher nearby. Never bypass or short BMS/protection circuitry. Opening packs should only be done in a controlled lab by trained personnel with spot-welders, battery testers, and thermal monitoring. Record serials and photograph damage for traceability before moving the pack.
How do I do a fast visual triage — what are the one-line rules for quick decisions?
Quick visual triage:
-
Swollen, smoking, leaking, or burning smell → Replace & recycle now (do not repair).
-
Charger refusal + visible damage → Quarantine & escalate.
-
No visible damage and OCV within usable range → proceed to measured checks below.
This triage prevents unsafe handling and quickly separates obvious rejects from candidates for testing.
What kit do you need to run reproducible diagnostics?
Required diagnostic kit:
-
Digital multimeter (DC, 0–30 V range, good resolution)
-
IR thermometer or thermocouple probe (for surface/spot checks)
-
Known-good OEM Ryobi charger and a verified “golden” pack for swap tests
-
Load device: representative tool for short load tests or a resistive electronic load (~1–5 A) for repeatable checks
-
Capacity tester or battery analyzer (technician level) — if available
-
PPE: safety glasses, insulated gloves, face shield (technician), non-conductive bench mat
-
Fire extinguisher (Class ABC or recommended type) within arm’s reach
-
Log sheet / CSV template (Serial, Date, Tech, OCV, V_load, Temp, Pass/Fail, Notes)
Having this kit ensures repeatability and defensibility of any go/no-go decision.

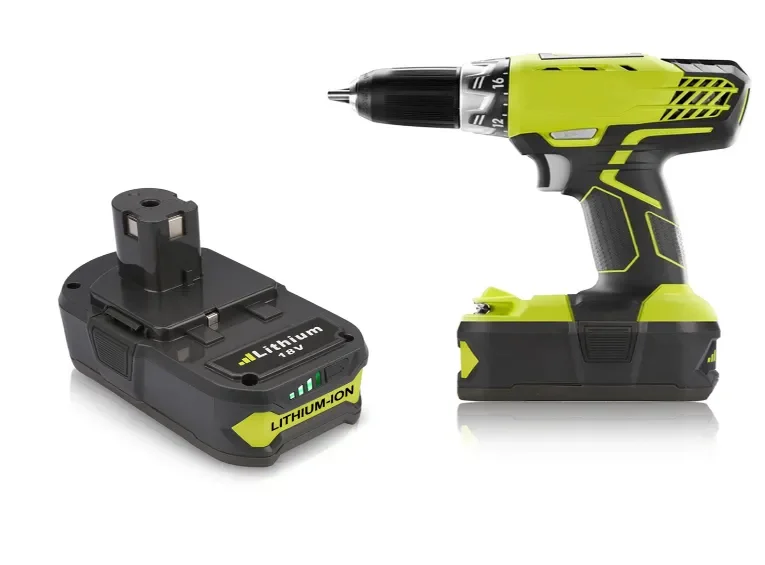
18V Lithium Ion Battery Replacement for Ryobi ONE+ Cordless Tools P108 P192
How do I perform the 60-second triage and basic checks in the field?
60-second field triage (stepwise):
-
Visual inspect for swelling, cracks, discoloration, leakage, or burn marks. If present → quarantine.
-
Seat pack in OEM charger and observe LED behavior for 60 seconds; record LED pattern.
-
Swap-test: put the suspect pack in a known-good charger and insert a golden pack into the suspect charger to isolate failure.
-
Measure OCV with multimeter (no load) and record.
-
If OCV ≥ ~18 V and charger accepts, proceed to load/sag test; else escalate per thresholds below.
Log time, serial, LED pattern and OCV immediately. These steps separate obvious bad packs from candidates for controlled revival or repair.
How should I measure open-circuit voltage (OCV) and interpret it?
OCV measurement procedure:
-
Set multimeter to DC volts (20–30 V range).
-
With the pack removed from charger/tool, carefully touch red probe to positive terminal and black probe to negative terminal; stabilize reading.
-
Record OCV to two decimal places if possible.
OCV interpretation (practical bands for 5-cell packs):
-
~20.0–21.6 V — near full: normal.
-
18.0–20.0 V — usable: proceed to load test.
-
~15.0–18.0 V — warning: attempt charger-wake; consider sample cycling and quarantine if behavior is inconsistent.
-
< ~10–12 V — severe: do not attempt consumer charge; escalate to pro/recycle.
Document readings; OCV is the first objective signal for repair feasibility.
What is the safe BMS “wake” sequence if a pack appears tripped or deeply discharged?
BMS wake (safest-first sequence):
-
Charger-wake: seat pack in OEM Ryobi charger for 10–30 minutes and monitor LED & temp. Some chargers apply small wake currents.
-
Alternate OEM charger: if available, try a different legitimate charger model/slot.
-
Tool-wake (light): use a non-high-draw tool and apply short trigger pulses (10–20 s) to coax BMS responses — do not apply continuous high load.
-
Temperature check: if ambient <5 °C, warm pack to >5 °C (room temp) and retry; if >50 °C at any point → stop and quarantine.
Stop conditions: pack becomes warm (>45–50 °C), emits odor, shows swelling, or LEDs indicate persistent fault — immediately discontinue and quarantine. Always record time and OCV changes after each step.
How do I run the field load / sag test and what thresholds matter?
Field load/sag test (10–20 s):
-
Ensure pack is at a stable OCV ≥ 18 V. Insert into a representative tool or attach a resistive load that draws a steady current.
-
Start the tool/load and measure pack terminal voltage during operation (or immediately after stopping if direct measurement impractical). Record V_load and duration.
Sag interpretation:
-
Healthy: sag ≤ ~1.0 V under test load.
-
Marginal: sag ~1.0–2.0 V — tag for sample cycling and monitor.
-
Failing: sag > ~2.0 V or tool cutout — likely high internal resistance or failing cells; route to technician evaluation or replace.
Also note any rapid temp rise; >50 °C → stop & quarantine. Repeat test on 2–3 samples when accepting a batch.